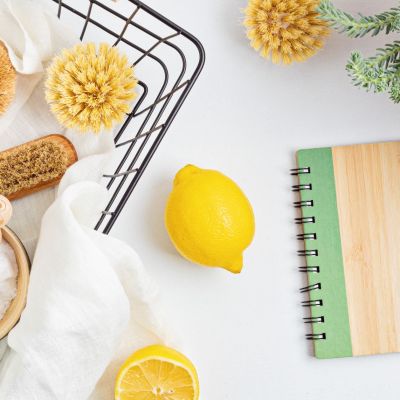
Making the Most of Your Candles: Creative Ways to Extend Their Life and Reuse the Jars
Candlelight is one of my favorite ways to add ambiance and warmth to our home. I love how a simple scent can completely transform the mood of a room. What I don’t love, however, is wasting the candles—whether it’s the wax or the beautiful jar they come in.
Over the years, I’ve learned to seek out candles that not only smell amazing but also come in gorgeous containers. These jars can always be upcycled into vases or storage around the house. But more on that in a moment…
Candles aren’t always cheap. I try to buy most of mine at discount stores like Marshalls, HomeGoods, TJ Maxx, Michaels, Tuesday Morning, and Target, but I can’t resist the occasional splurge at Anthropologie or a local boutique. I don’t mind paying a little more for a high-quality candle, but it’s frustrating when the wick burns out before all the wax is used up. I could be doing something wrong, but more often than not, the wick has burned down and there’s still a third of the wax left in the jar!
The key is getting every last bit of wax out of the jar before recycling it. I’ve tried a few methods over the years and recently heard that freezing the candle is a quick and easy way to remove the wax. Curious, I gave it a try, and it worked pretty well! I put the candle in the freezer overnight, then used a spoon to chip out the wax. But then I thought… that’s a lot of waste! So I decided to revisit the method I usually use: heating the candle in a pot of warm water. The water doesn’t need to be boiling—just warm enough to melt the wax into a liquid (I remove the wick before heating, but it can also be done afterward).
Now, it’s time to save that wax! I recently had four leftover candles from Christmas, and I realized how much wax was still sitting in each jar once the wick burned out completely. In the past, I’d simply throw the hot wax in the trash and recycle the container. But this time, I wanted to find a way to extend the life of that wax.
Years ago, I had a plug-in warmer that melted wax without lighting candles. It was all the rage at the time, and I remember stocking up on packs of wax melts in various scents. So off I went to the craft store in search of a mold. In the baking aisle, I found an array of silicone molds, typically used for sweets and small treats. Perfect! (And don’t forget that craft stores often offer great coupons!)
Now, when I melt the candle wax, I pour it into my special silicone molds. You can see how many wax melts I was able to make from just four burned-out candles. I couldn’t believe how much wax I saved! (You can find similar molds on Amazon as well.)
It only takes a few minutes for the wax to harden in the molds, and then they pop right out of the silicone. Here’s a quick tip: Pouring the wax can be a little messy, so I recommend placing wax or parchment paper underneath the molds to catch any drips. Also, the candle jars can get quite hot from the melting process, so be careful! I found wearing a winter glove gave me better control without burning my fingers.
Once the wax is poured, I grab a paper towel to clean out the remaining wax from the jar, then wash the container with hot water and dish soap.
Since each candle had a different scent, I store the wax melts separately in canning jars, back in their original containers, or in wax sandwich bags until I’m ready to use them in the warmer.
I’ve noticed that many stores still sell plug-in candle/wax warmers, but I prefer something a little more discreet and portable. For now, I use a basic butter warmer—it was more affordable and I can easily move it around the house without needing to plug it in. It might seem like a strange choice, but I actually love it! And I’m thrilled that I don’t have to throw away all that wax.
Now that the wax is out of the jars, here are a few ways I’ve repurposed those beautiful vessels around the house:
I’ve placed two of them on our bookshelves—one is holding flowers, while the other is storing a dice game that our family enjoys.
Pro Tip: This gold hammered candle jar was a great deal, especially considering how pretty the container is. (I lined the bottom with a piece of felt to protect surfaces.)
I’ve found candle jars especially useful in the bathroom. One is holding cotton swabs, but they also work great for toothbrushes, floss picks, hairbrushes, and combs. Another is perfect for hiding hair ties and bobby pins while keeping the bathroom counter clutter-free.
One of the first candle jars I ever upcycled was used for makeup brushes. It was the perfect size and a great way to keep things tidy!
Let’s talk office supplies! Candle vessels are ideal for holding paperclips, rubber bands, washi tape, tiny craft supplies, pushpins, and even charger cords. The possibilities are endless.
It’s a bonus when the jar has a lid, as it allows you to truly hide the contents and use it as a storage container.
In the bedroom, candle jars make great catch-alls for jewelry, lip balm, medication, earplugs, or whatever else you keep by your bedside. They’re perfect for keeping your nightstand neat and organized.
And how about the laundry room? They’re great for holding pocket change, clothespins, safety pins, and buttons.
That’s how I use these lovely candle jars around our home. I’m sure you could come up with even more creative ways to repurpose them! While this isn’t a new trend, it’s always a great reminder to upcycle and reuse when we can.
One last thing! I recently discovered these candle warmers that melt the wax evenly without the need to light the wick (or make molds). I haven’t tried them personally, but it seems like a great option for using up the last bit of wax before recycling the jar.
And of course, always be cautious with candles—whether you’re using a plug-in warmer or an open flame, safety should come first. ♥